Configuring On Board SD Card Interface
There are two basic options when configuring the OS file /etc/fstab to auto mount the SD card at boot-up rather than using mount commands, either on the command line or via rc.local, these depend on how the disk is to be referenced.
Directly referencing the disk by its /dev/sdxy reference has the benefit that the SD card can be swapped out without affecting the mount process, but has the drawback that the sdxy ident used by the SD card could change if additional flash disks are plugged into USB slot(s) before power up due to the way in which the USB bus is initialised and devices are discovered.
Referencing the disk by its unique UUID reference number side-steps this problem, but if the SD card is then changed then the UUID number used in fstab as a disk reference will stop matching the new SD card's UUID number and so the mount process will fail.
A compromise solution here would be to create a new udev rule to catch the SD card interface and create symlink shortcut references for each of the partitions, this way know for sure which of the sdx devices is the SD card and can use these as the disk reference in fstab.
In this example let's first show how to mount disks automatically using the UUID method
To find a disks UUID reference type the below at the prompt :
ls -l /dev/disk/by-uuid
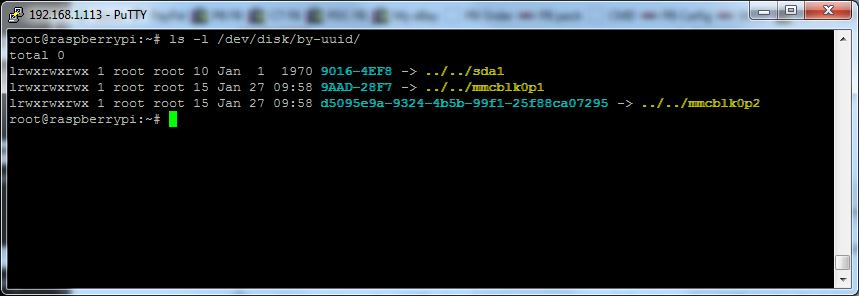
Here you can see that the SD card is shown as /dev/sda1 and UUID 9016-4EF8
So we can now use this in /etc/fstab so the device is automounted at start up
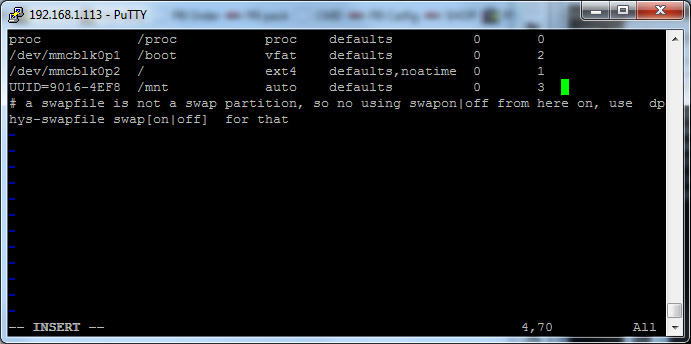
The below example shows the procedure for configuring /etc/fstab to auto mount the SD card at boot using the UUID number and we've chosen /mnt as the mount point in this case.
Note that in this example we are using just the basic default and have not added any options like noatime, we've also specified disk as third in the sequence for the boot up fsck scan (see man fstab for more information on what options are available here).
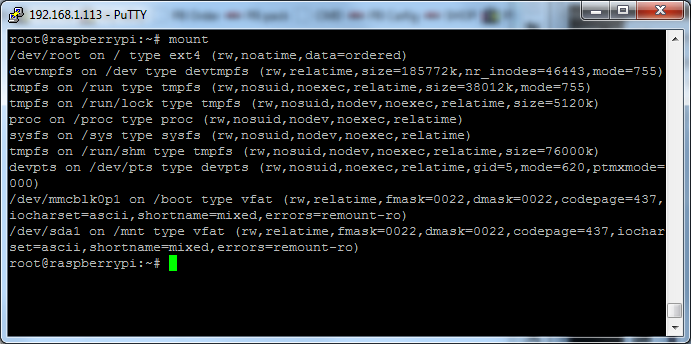
At the next reboot the SD card (sda1) has been successfully mounted onto /mnt
OK so let's redo this, but this time we'll create and use a udev rule that sets up shortcuts that always point to the internal SD card, making administration easier and allowing for a more flexible fstab mount statement.
We'll start off by creating the udev rule below that targets the on-board SD card controller, this has been already setup on the standard image
This rule will create /dev/sdcard references for each of the partitions on the SD card, giving a handy short-cut for each one :
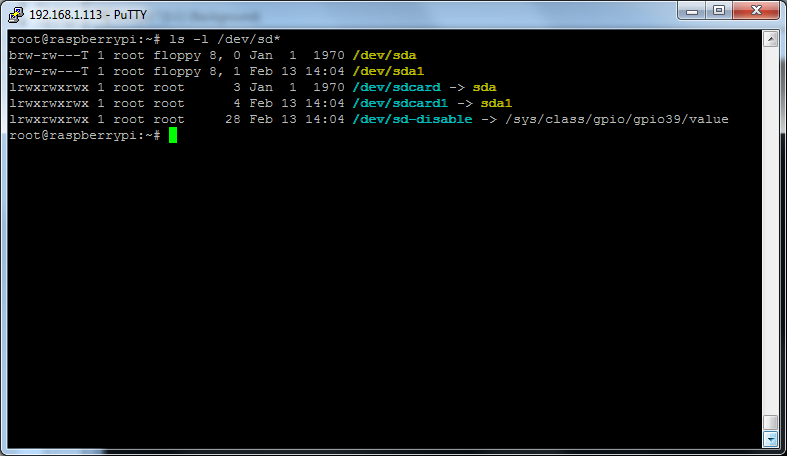
So we can now re-edit our fstab and use the disk reference /dev/sdcard1 rather than the UUID reference :
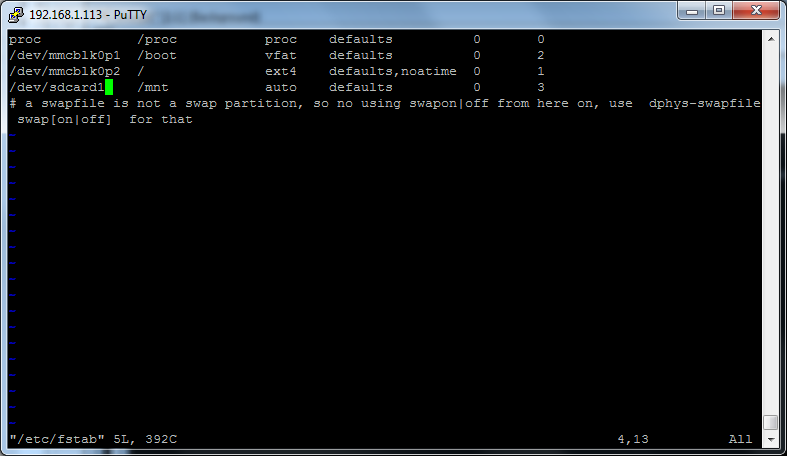
Save and reboot shows the mount has worked successfully :
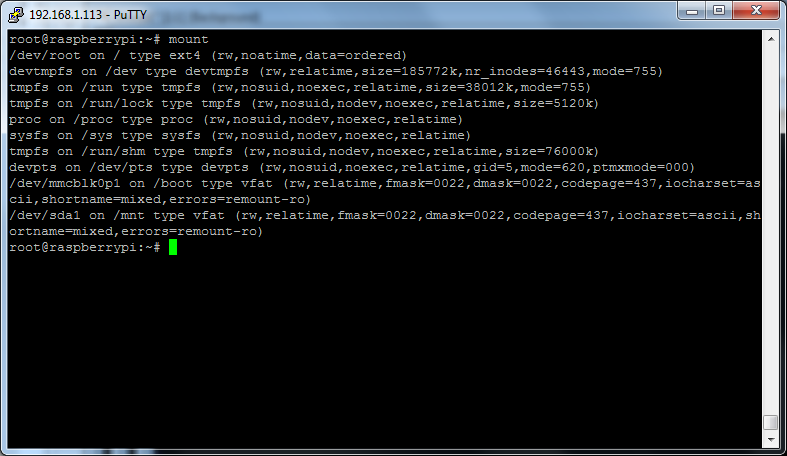
Note that the system shows /dev/sda1 and not /dev/sdcard1 as /dev/sdcard1 is a symlink to a device rather than a real device.
In the examples above we have used /mnt as the mount point, however this could equally be almost any folder under the root directory such as /usr/local/bin with the right configurarion, allowing you to easiliy expand the core file system.
For more information on selecting the most appropriate SD card for use with your Embedded Raspberry Pi device see our KB article Industrial SD Cards