mPCIe Modem QMI Interface Internet Connection Setup
The new generation of LTE mPCIE modems provide both HSDPA/3G and LTE/4G wireless connectivity, these modems by default use the newer QMI interface as the primary connection method, as opposed to PPP over serial or Direct IP as with earlier modems in the range, and are currently best supported by Raspbian Jessie OS or above as this has support for the libqmi interface tools.
In this example we'll use a Sierra Wireless MC7304 modem and start by installing the udev rule (20-modem-7304.rules) in /etc/udev/rules.d from the modem rule pack. This sets up shortcut references to allow us to consistently identify which of the ttyUSBx ports do which functions
Whilst some LTE modems still provide a legacy serial port for PPP style connection modem control is optimally done through the /dev/cdc-wdm0 QMI interface so we need to install the software support packages via the command below:
apt-get install libqmi-utils
This installs two main utilities (qmi-cli tool and qmi-network helper script) these are used for interaction with the modem (see man qmi-cli for more details)
We found the the next step provided easier control over the Sierra Wireless modem and network routing and involves using minicom to issue some AT configuration commands directly to the modem's serial port that remove the extra unused wwan network ports, this step is optional on the Sierra Wireless modem and not applicable on other modem brands.
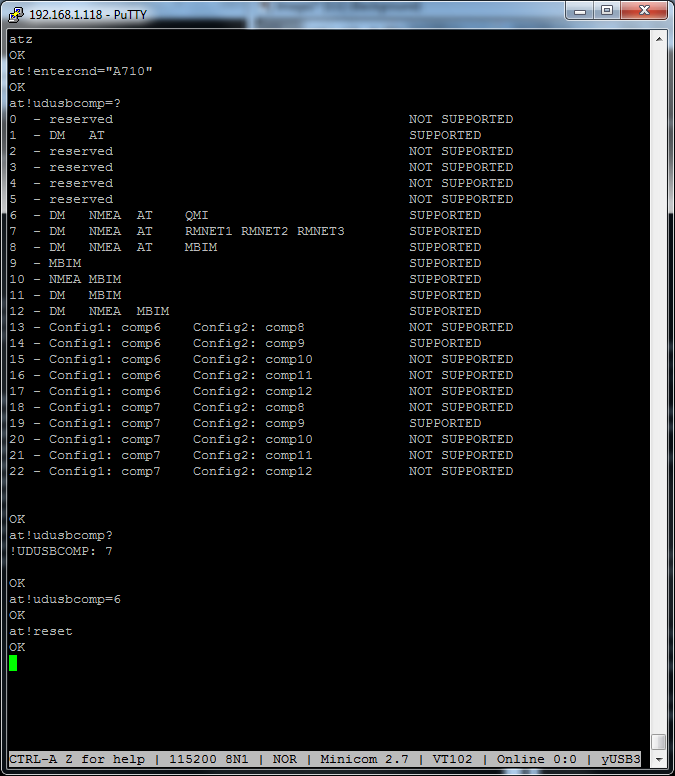
# minicom -D /dev/ttymodemAT
Press CTRL+A E key combination to enable local echo

at!entercnd="A710"
AT!UDUSBCOMP=6
at!reset
Next we have to check/reconfigure the modems data link format method to 802-3
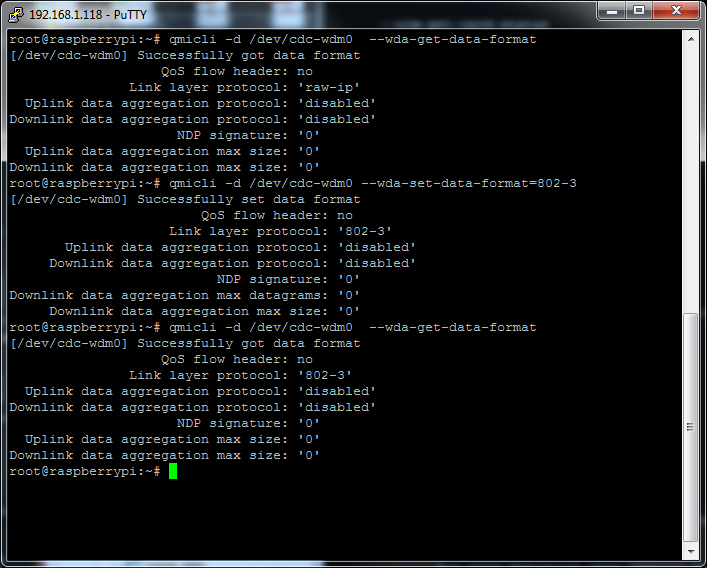
qmicli -d /dev/cdc-wdm0 --wda-get-data-format
qmicli -d /dev/cdc-wdm0 --wda-set-data-format=802-3
Note : The modem will not sucessfully aquire an IP address using the stock DHCP client 'dhclient ' unless the modem is configured into 802-3 mode, if your modem does not support/will not change to 802-3 mode see QMI help note #2 for instructions on how to operate the modem in Raw IP mode.
The SIMs APN configuration is set by creating and then adding a line to /etc/qmi-network.conf - Consult your carrier for the correct APN name and insert it into the configuration file as shown below :
echo "APN=your.sim.apn.name.here" >/etc/qmi-network.conf
Having checked we've registered on the network and have good signal and configured the APN let's push on and connect to the network
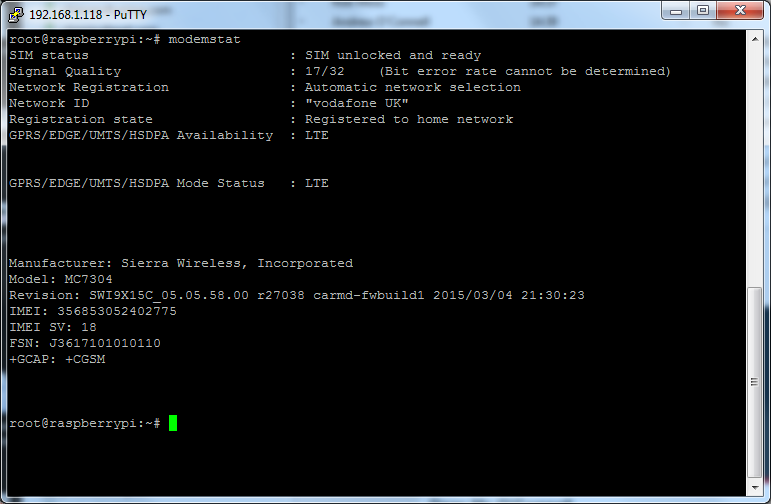
There are essentially 3 steps here:
1. Ensure the wwan0 network interface is ready
2. Connect to the cellular network
3. Run the DHCP client on the wwan0 interface to configure the IP address and routing/DNS from the cellular provider
So let's step through a sample connection here before we look at automating it :
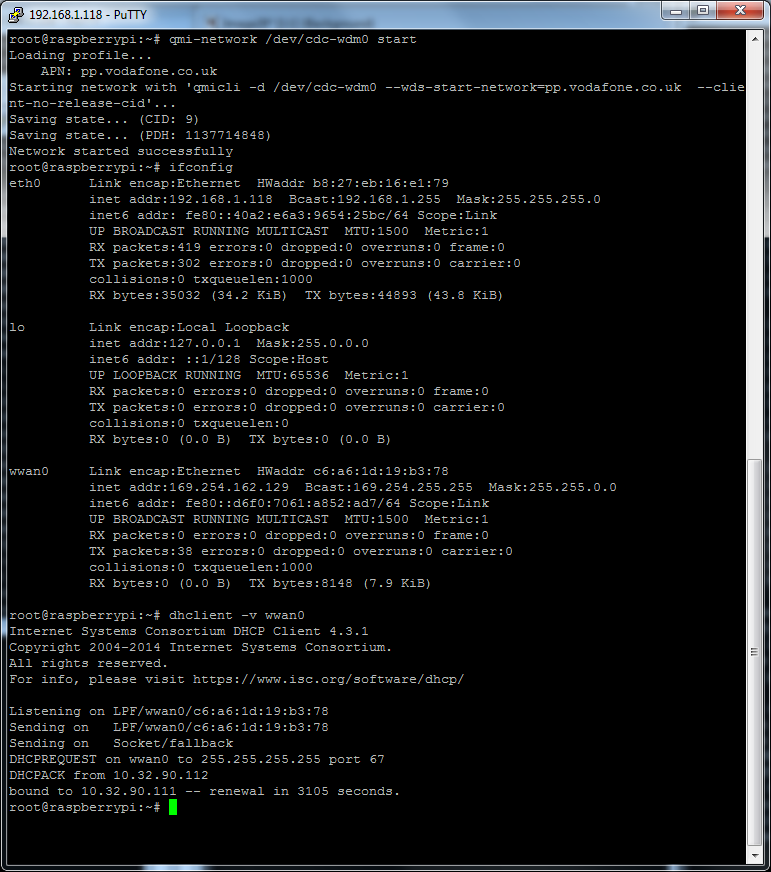
qmi-network /dev/cdc-wdm0 start
dhclient -v wwan0
Note : Raspbian Stretch has a bug in the stock version of the qmi-network utility, if you see error: couldn't start network: QMI protocol error (64): '(null)' when attempting to start the network see this page
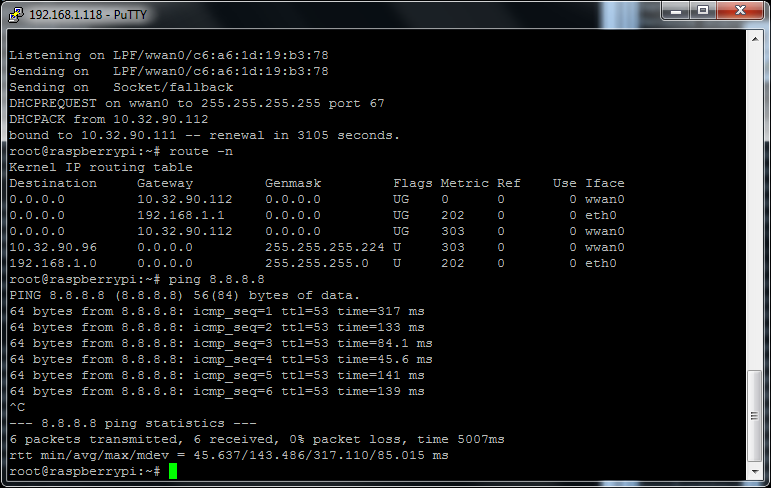
You'll see that once the network connection is made the network interface just needs to be configured via dhclient, this has the bonus of automatically configuring routing and DNS.
To manually disconnect the cellular link use the command
 qmi-network /dev/cdc-wdm0 stop
 ifdown wwan0        # Jessie
 ifconfig wwan0 down # Stretch
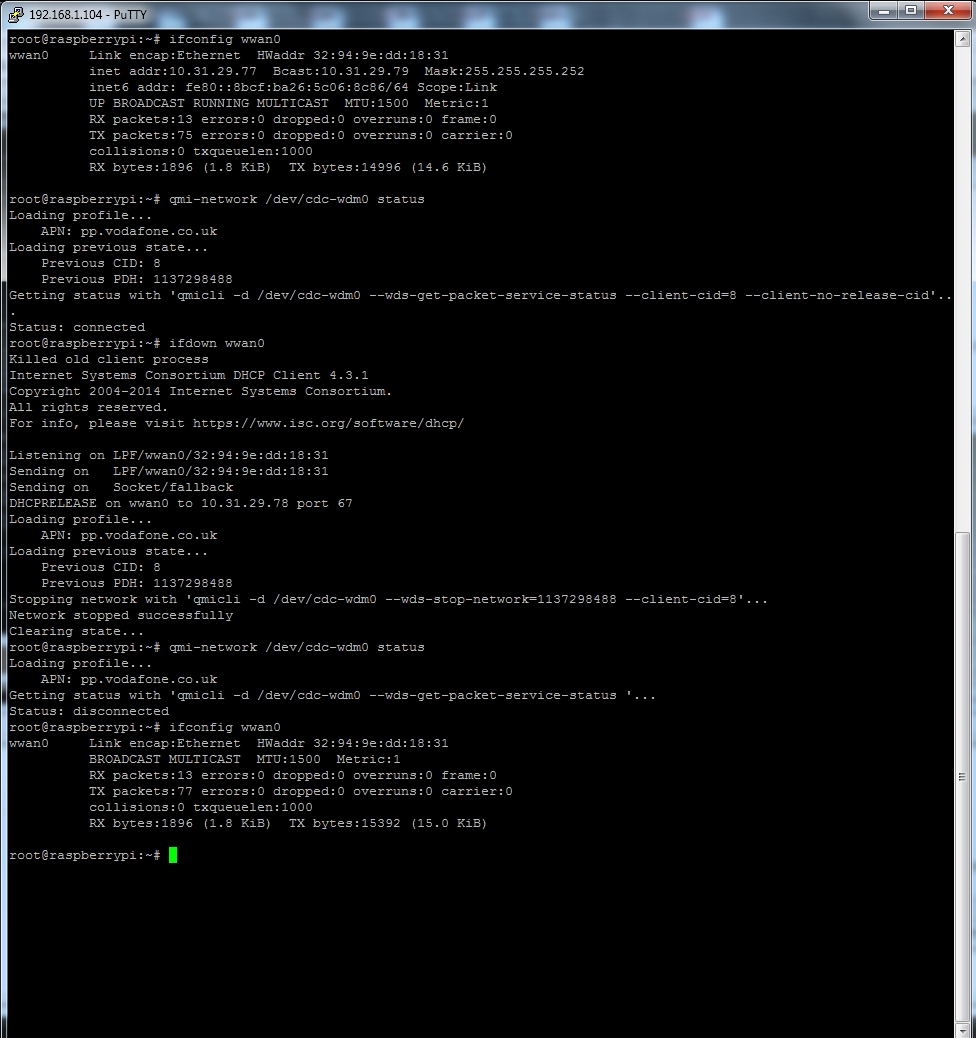
Note that once the network connection is disconnected the interface will need to be brought down to correct the routing/DNS configuration.
The modemAT serial interface can be used as normal to interact with the modem or send SMS messages even when connected to the internet.
These sequence of steps can be automated by creating the configuration file /etc/network/interfaces.d/wwan0 with lines below:
  iface wwan0 inet dhcp
     pre-up for _ in $(seq 1 10); do /usr/bin/test -c /dev/cdc-wdm0 && break; /bin/sleep 1; done
     pre-up for _ in $(seq 1 10); do /usr/bin/qmicli -d /dev/cdc-wdm0 --nas-get-signal-strength && break; /bin/sleep 1; done
     pre-up /usr/bin/qmicli -d /dev/cdc-wdm0 --wda-set-data-format=802-3
     pre-up /usr/bin/qmi-network /dev/cdc-wdm0 start
     post-down /usr/bin/qmi-network /dev/cdc-wdm0 stop
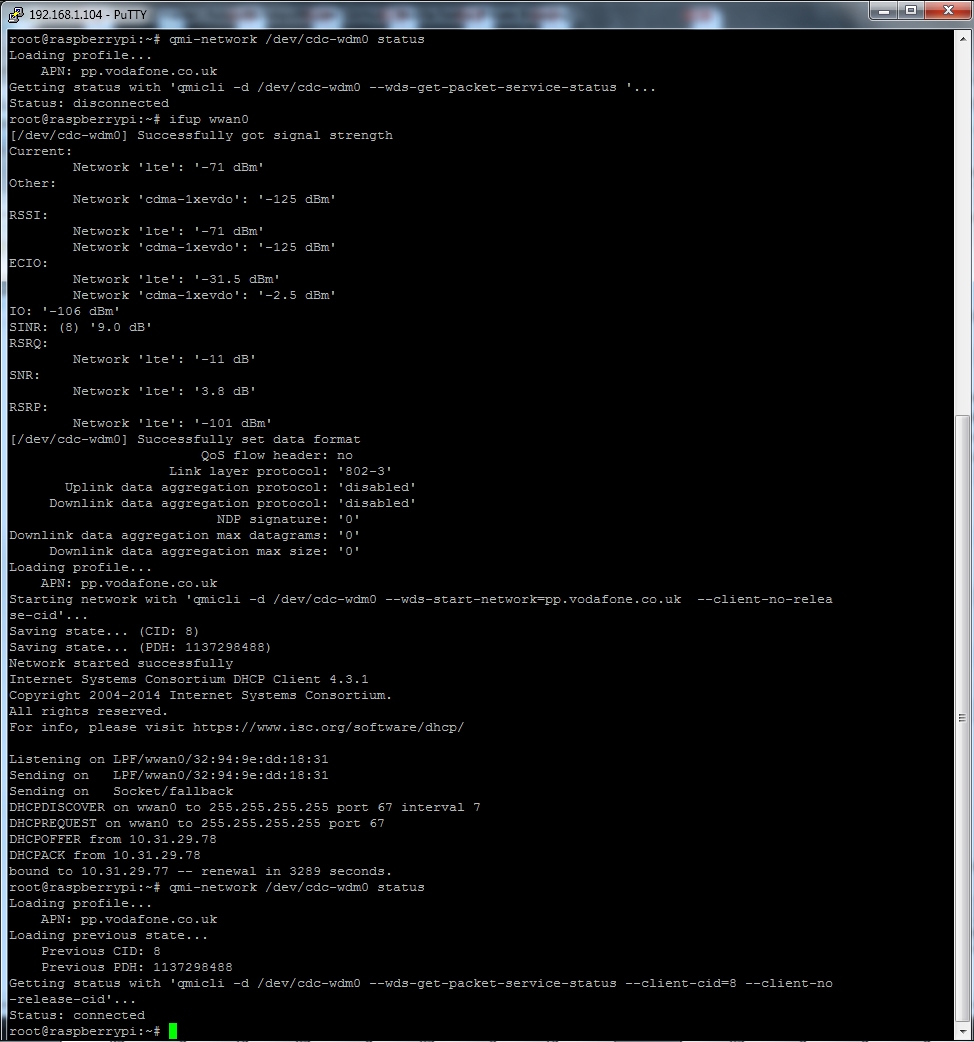
With this in place wwan0 will attempt to make a cellular connection each time the interface is brought up, depending on how long the DHCP process takes you the interface may take a while to get a usable IP address for network useage.
You may find at startup that the wwan0 interface is enabled but is in a disconnected state (usually with a 169.254.x.x. address) before the modem has connected fully and obtained an IP address.
See below example
Other commands of interest are shown below, for more information see man qmicli
 qmicli -d /dev/cdc-wdm0 --nas-get-signal-info
 qmicli -d /dev/cdc-wdm0 --nas-get-signal-strength
 qmicli -d /dev/cdc-wdm0 --nas-get-home-network
 qmicli -d /dev/cdc-wdm0 --nas-get-serving-system
 qmicli -d /dev/cdc-wdm0 --dms-uim-verify-pin=PIN,0000
 qmicli -d /dev/cdc-wdm0  --wds-get-packet-service-status
 qmi-network /dev/cdc-wdm0 status
To help the process of getting and maintaining a connection we have create an example script set that can be run as part of the boot process to automate and supervise the modem connection, download these using the link below
Modem QMI Supervisor Script Set
[ wget --no-check-certificate 'https://drive.google.com/uc?export=download&id=1XykpbQP5Hf-o9JmoT1lbGgDPeA8KGjMi' -O modemcomms-scripts.tar.gz ]
It is worth reading through the section on modem troubleshooting as this covers the more common issues with establishing and maintaining a network connection.
For reference the Sierra Wireless MC73xx range can use below AT commands (using a minicom terminal) to alter the modem interfaces presented to the OS, use this with care as it's possible to brick your modem with these commands :
AT!ENTERCND="A710"      # Enter comand mode
AT!USBCOMP=?            # Display USB interface command syntax
AT!USBCOMP              # Display USB interface current settings
AT!USBCOMP=1,1,10D      # Set two wwan net interfaces (default)
AT!USBCOMP=1,1,50D      # Set one wwan net Interface
AT!RESET                # Reset after updating