MyPi Prototype IO Card Surface Mount Assembly
Surface mount assembly has traditionally been out of reach for the hobbyist or low volume user due to requiring all manner of specialist equipment for the assembly process and usually required the services of a Contract Electronics Manufacturer (CEM).
Today this process is much more accessible requiring relatively low outlay in equipment costs to obtain a high quality finish, and it's much easier than you'd think
In this section we'll briefly document the process needed to produce a MyPi I/O Card, before we do so have a watch of the below videos which detail what we'll be doing :
EEV Blog - Surface mount Assembly With Stencil
Arrow Electronics Video Guide To Surface Mount Assembly
Creating Gerber Files Using Eagle
Creating Solder Stencil From Eagle
We'll be broadly following the same method used in the EEV blog video so take some time to look through this before starting. The Arrow Electronics video tutorials also give a very good introduction on how surface mount solder paste works and a slightly more messy method of how to use it if for some reason you do not want to use a stencil.
In our demo we'll be using the following kit:
- PCB to assemble + Kit of parts
- ATTEND 858D Hot air gun
- Plastic surface mount stencil
- Solder paste
- Tweezers + Plastic card (for placing components and for solder paste application)
Low cost surface mount stencils can be obtained from a variety of different websites (including Botech), for this example we've purchased our one from www.smtstencil.co.uk
We've purchased a batch of PCBs from Botech to try out a new design, this is mostly using 0805 sized parts to aid hand assembly which is fine as we've plenty of space here.
We'll start by pasting up the PCB using the stencil and a handy credit card sized piece of plastic used to draw the paste through the stencil to ensure the entire area is covered.

Now comes the time consuming part of laying all the parts out onto the PCB, note that the positioning doesn't need to be critical as the parts will self align due to the surface tension of the solder once the solder paste reflows (it's pretty neat stuff to watch happening)
Now time for the fun part, find yourself a well ventilated area, the equipment gets HOT so take care to avoid burns. I've set the hot air gun to 270 deg C with an air flow of 3 and no attached nozel, you may need to experiment a bit with the settings to get one that works best for you.
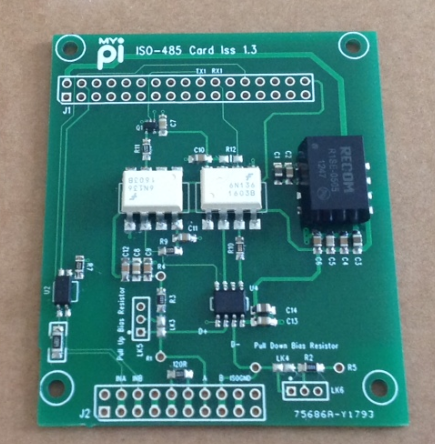
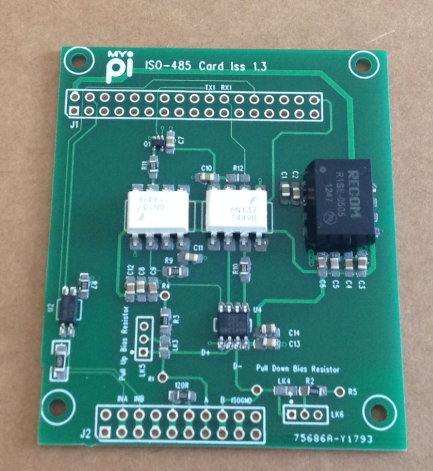
Here's the finished part, now all we need to do is add the PTH pin headers to the bottom and it's ready for testing!